How to Create a Consistent AI Character Across Multiple Scenes with Nano Banana Pro
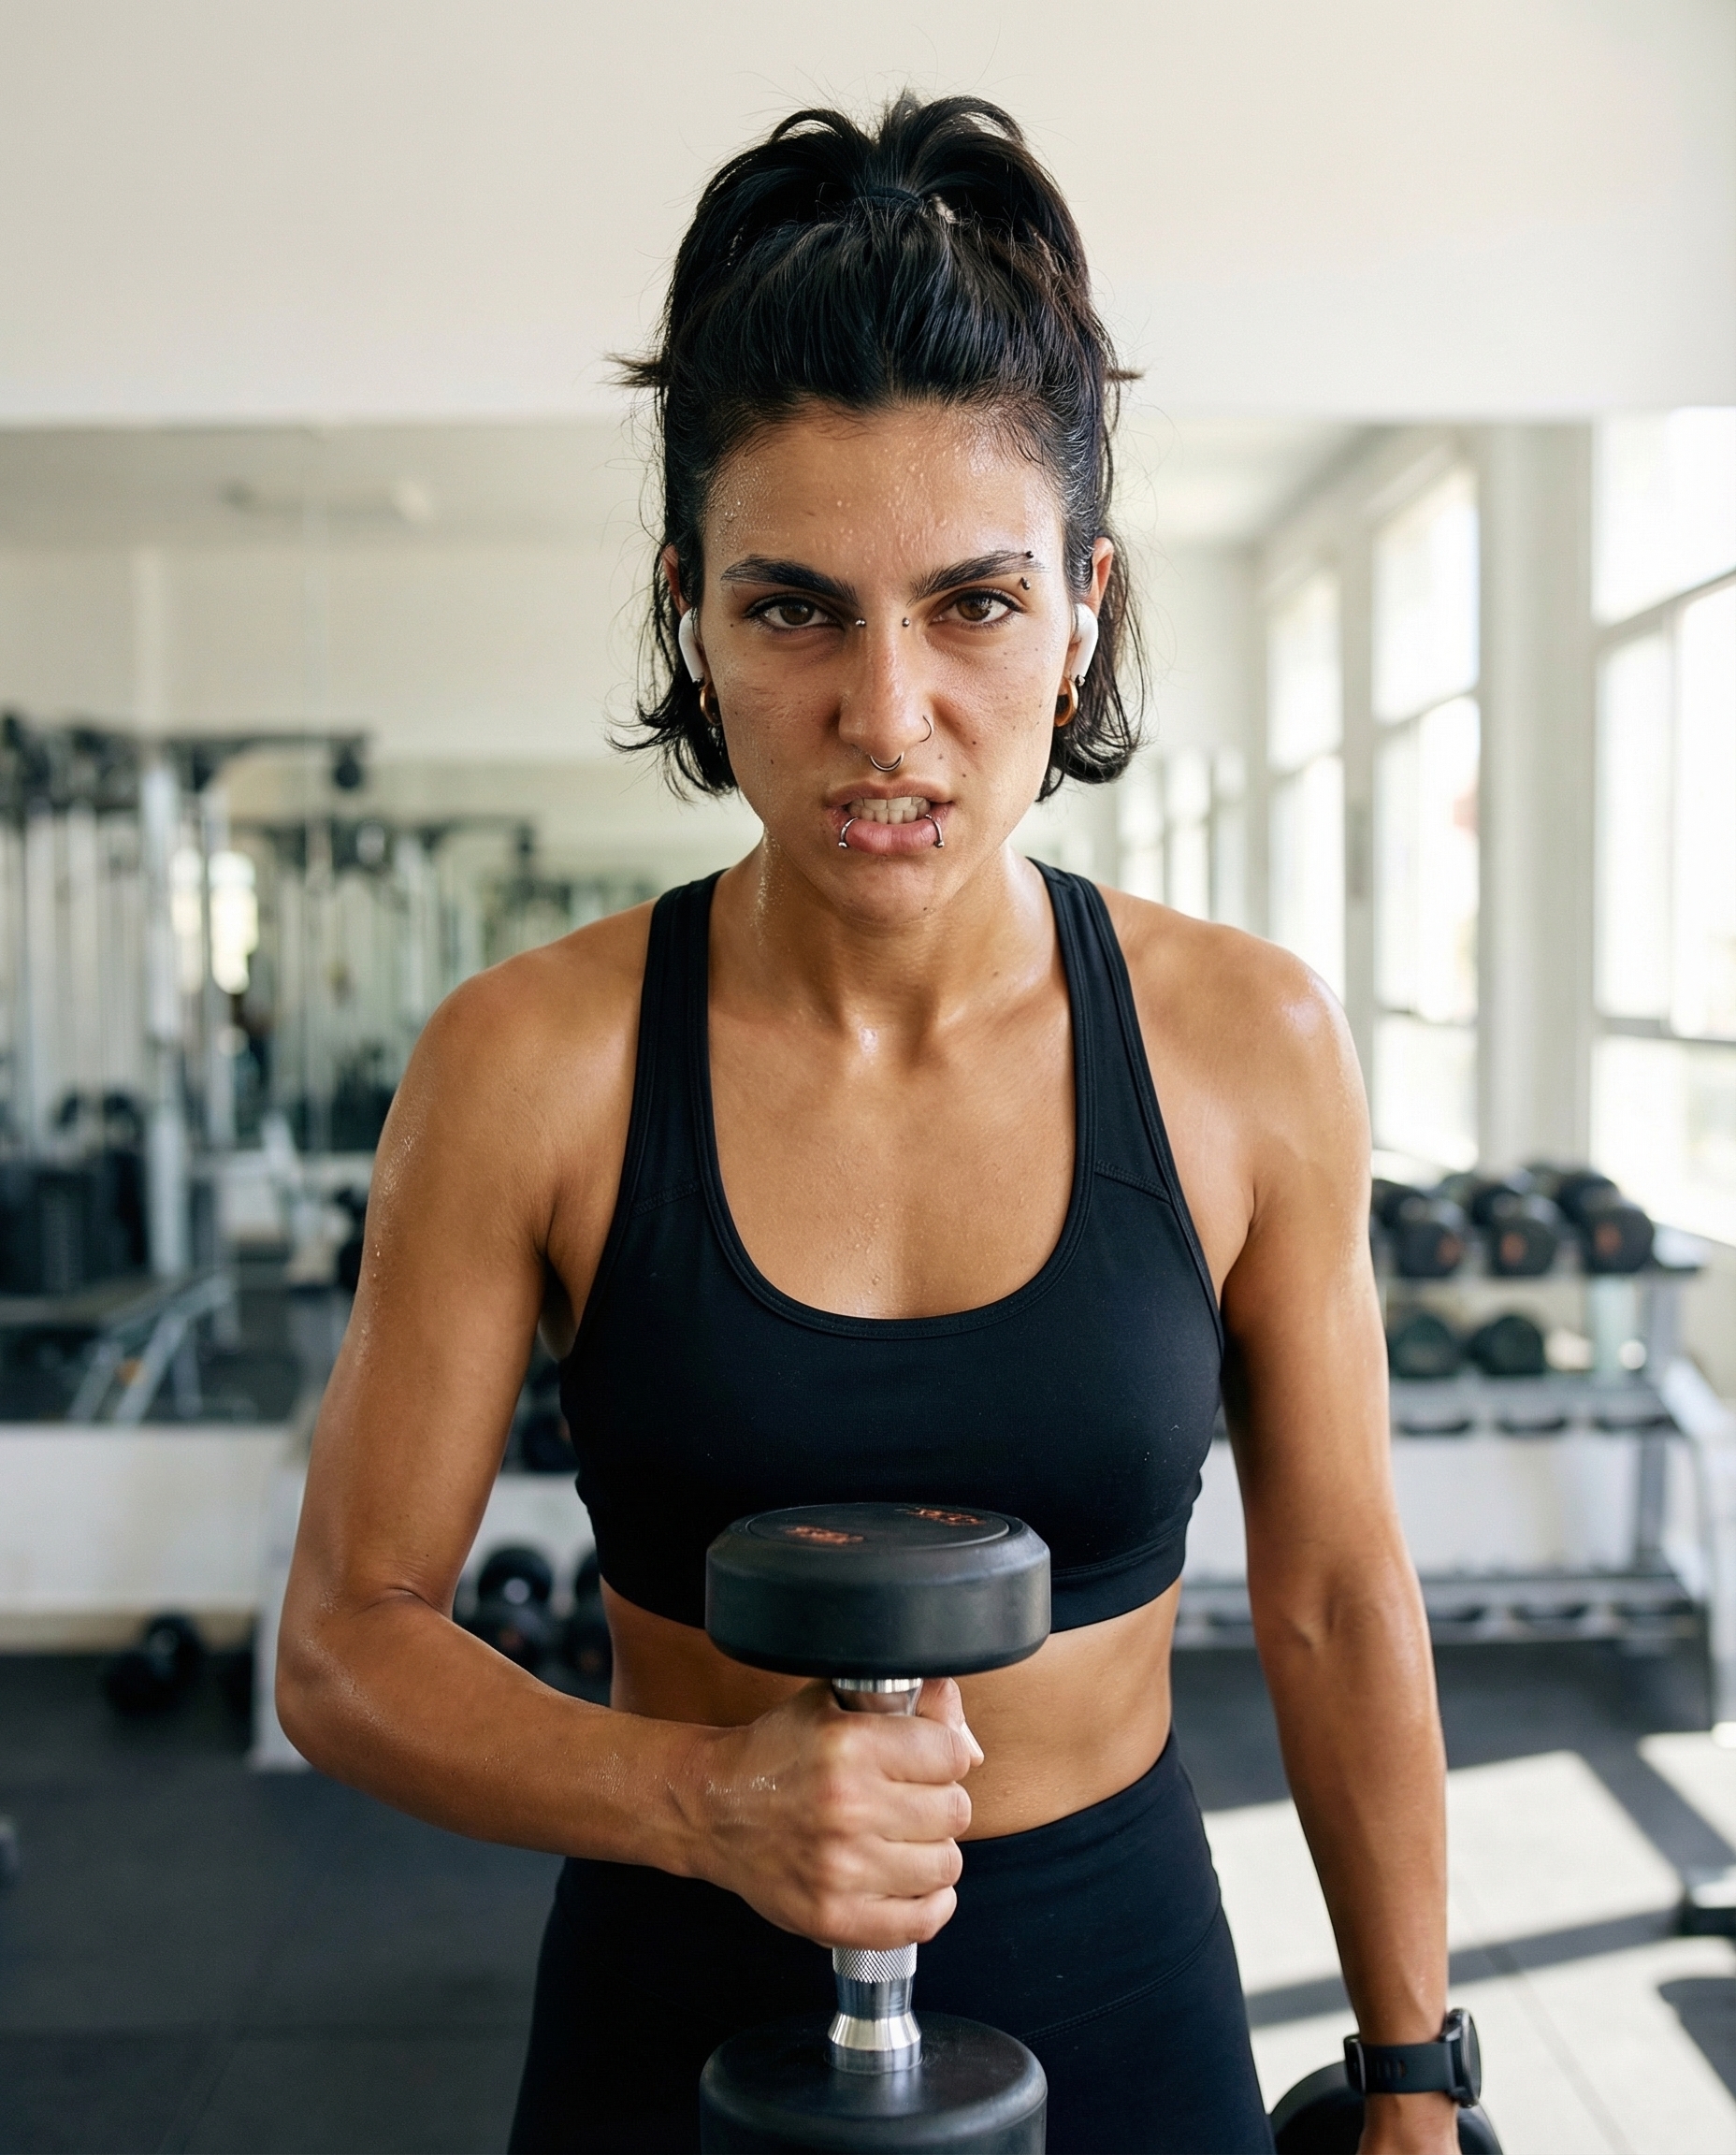
One of the biggest challenges in AI image generation has always been character consistency — getting the same person to appear across multiple images in completely different settings. With Google's Nano Banana Pro (built on Gemini 3 Pro), this is now remarkably achievable.
In this guide, we'll walk you through the exact techniques used to generate a single character across seven distinct scenes — from a lazy morning selfie to a high-energy gym session — all while keeping her facial features, piercings, and overall identity perfectly intact.
What Is Nano Banana Pro?
Nano Banana Pro is Google DeepMind's latest image generation model, built on top of Gemini 3 Pro. Unlike older diffusion models, it combines a deep reasoning core with a high-fidelity diffusion head. This means it doesn't just generate pixels — it understands what it's creating.
Key capabilities:
- Native 2K resolution with physics-accurate lighting
- Scene planning before rendering — the model reasons about composition
- Character consistency through detailed prompt comprehension
- Photorealistic skin textures, pores, and micro-details
- Flawless text rendering in multiple languages
The Character: Building a Detailed Anchor Prompt
The foundation of character consistency is your anchor description — a detailed, reusable block that defines your character's identity. Here's the one we used for this series:
The key details that make this character recognizable across scenes:
- Piercings: septum ring + lip piercing (these are her "signature")
- Hair texture: dark, curly/wavy — not straight, not tight curls
- Skin tone: warm olive — consistent under any lighting
- Accessories: gold hoop earrings + thin chain necklace
Scene 1: Morning Bed Selfie
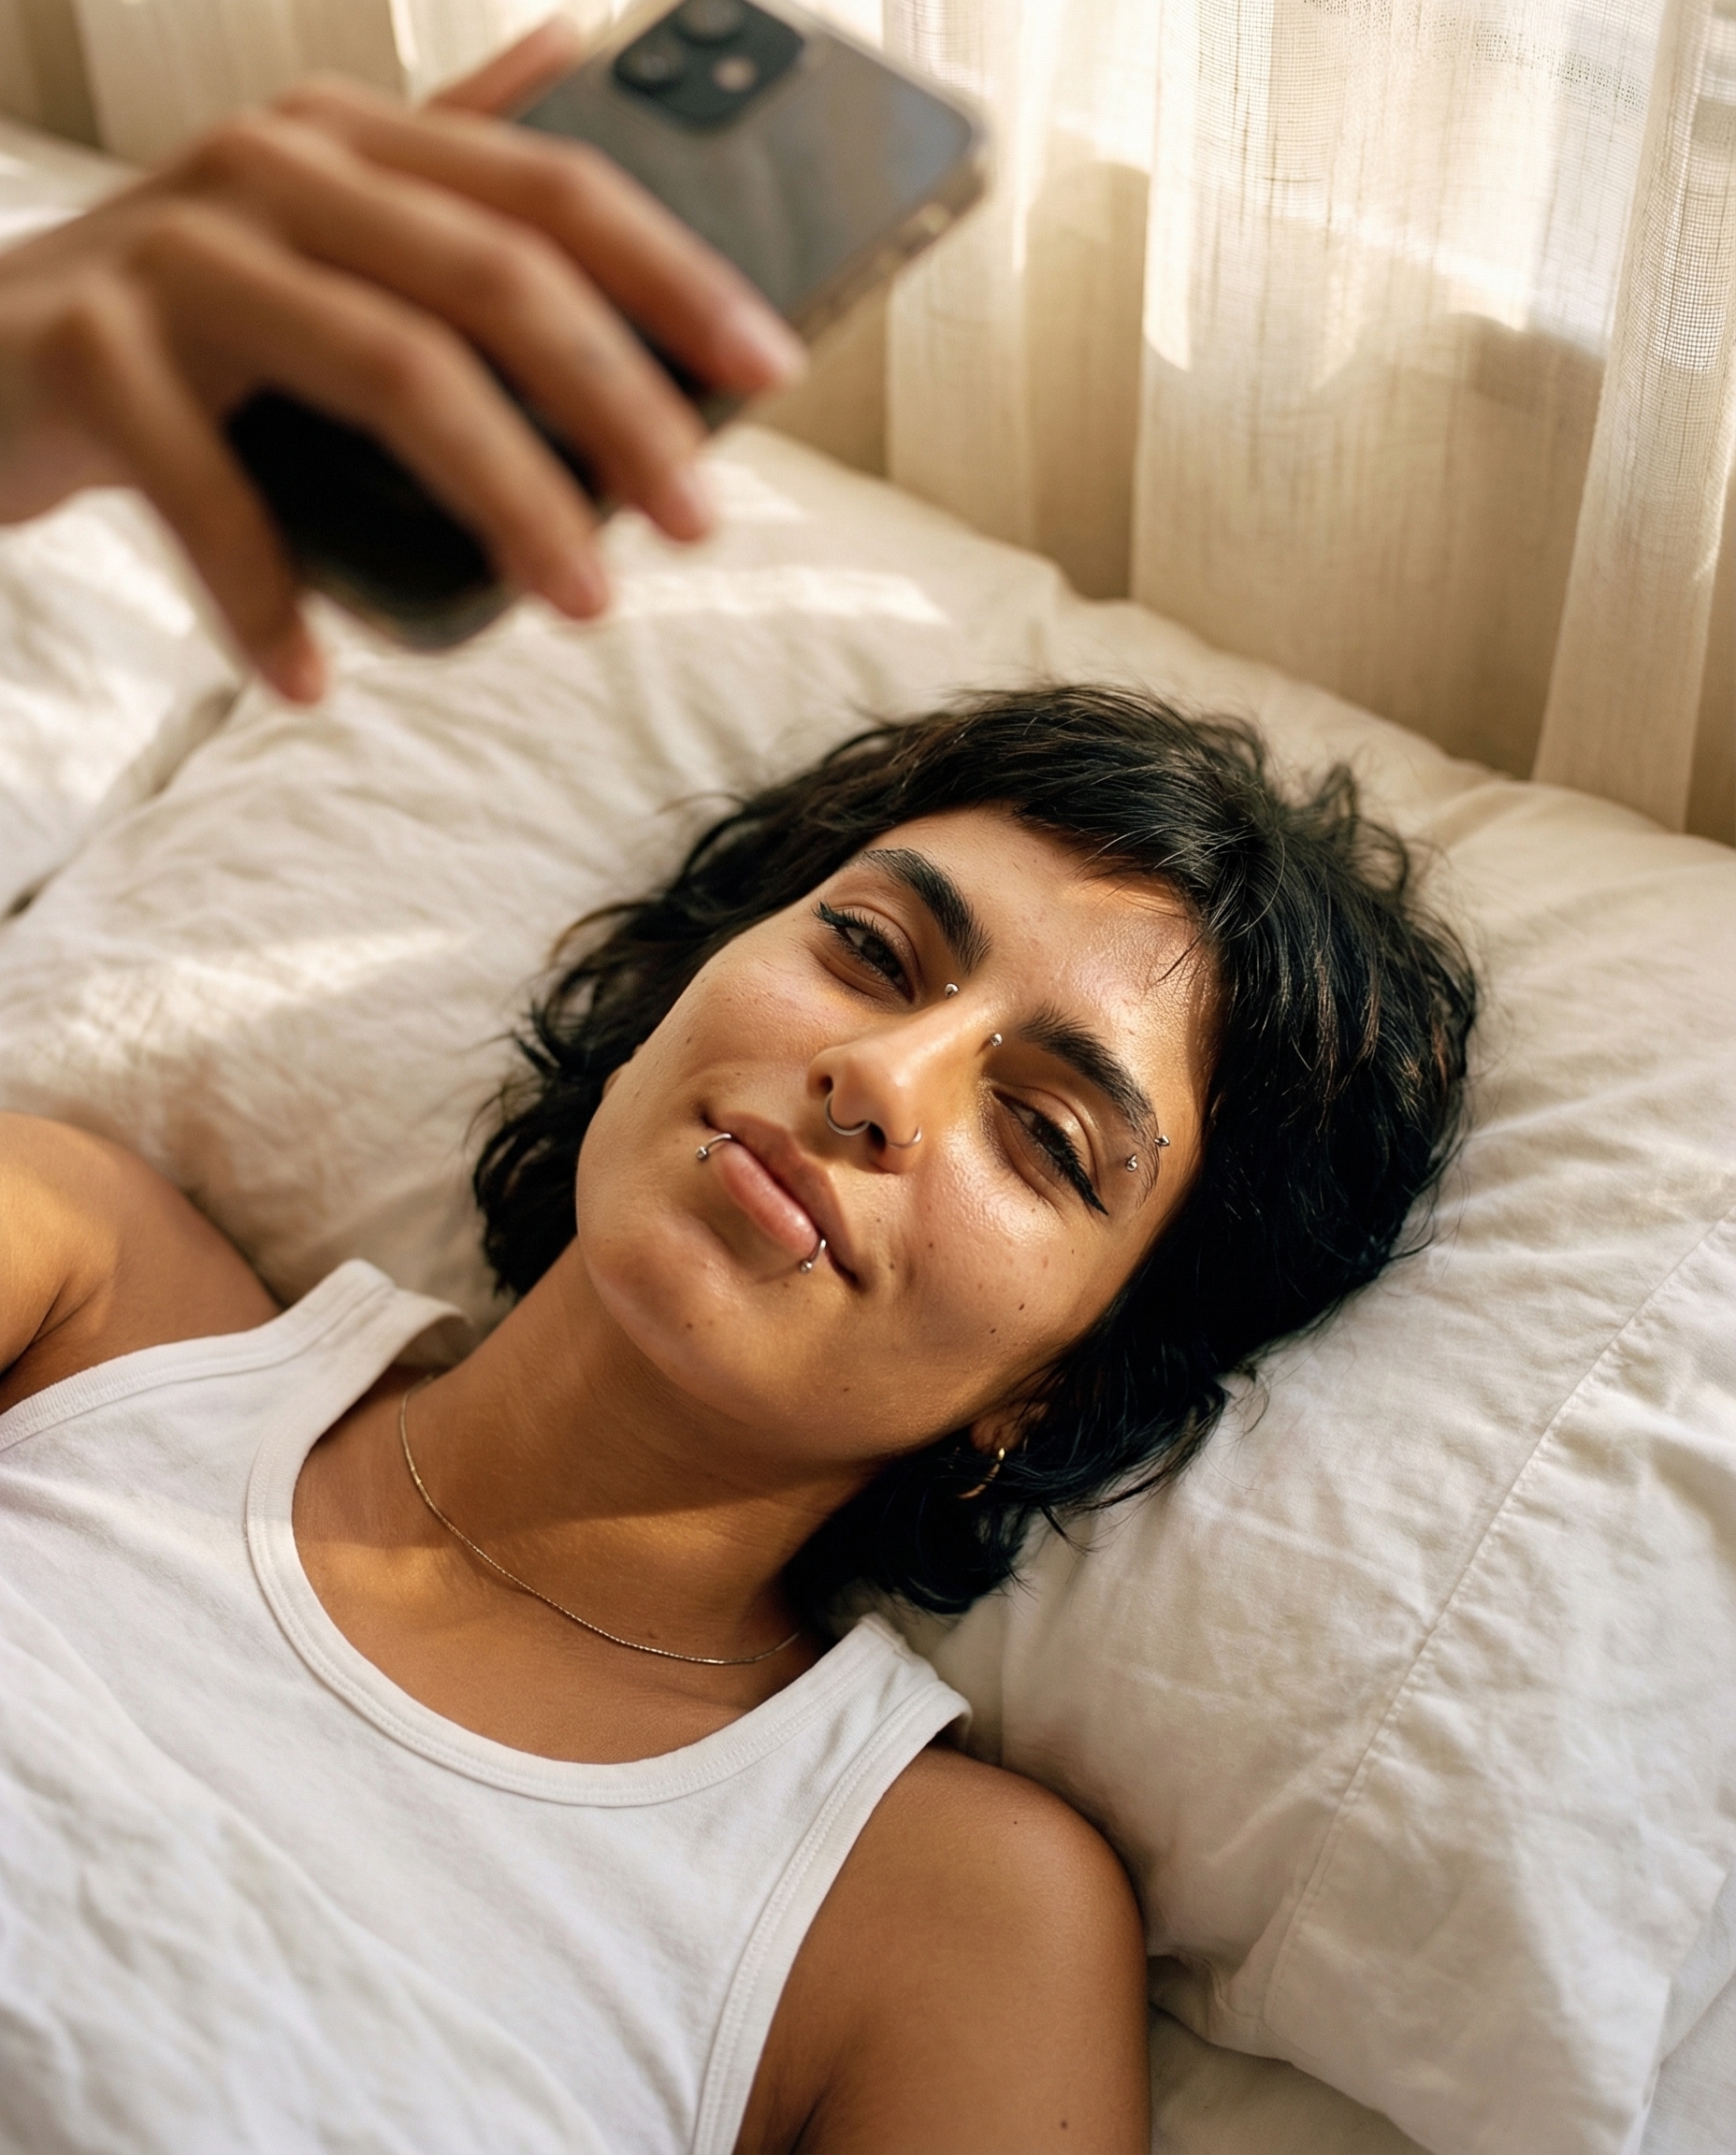
Scene prompt additions: Lying in bed on white linen sheets, holding phone up for a selfie, wearing a white tank top. Warm morning sunlight through sheer curtains. Shot from slightly above (phone perspective). Soft, intimate, natural — no studio lighting. Shallow depth of field.
Notice how the model handles the overhead perspective while keeping her facial features recognizable. The septum ring and lip piercing are clearly visible even at this casual angle. The warm morning light creates natural skin tones that match her olive complexion.
Scene 2: Studio Portrait
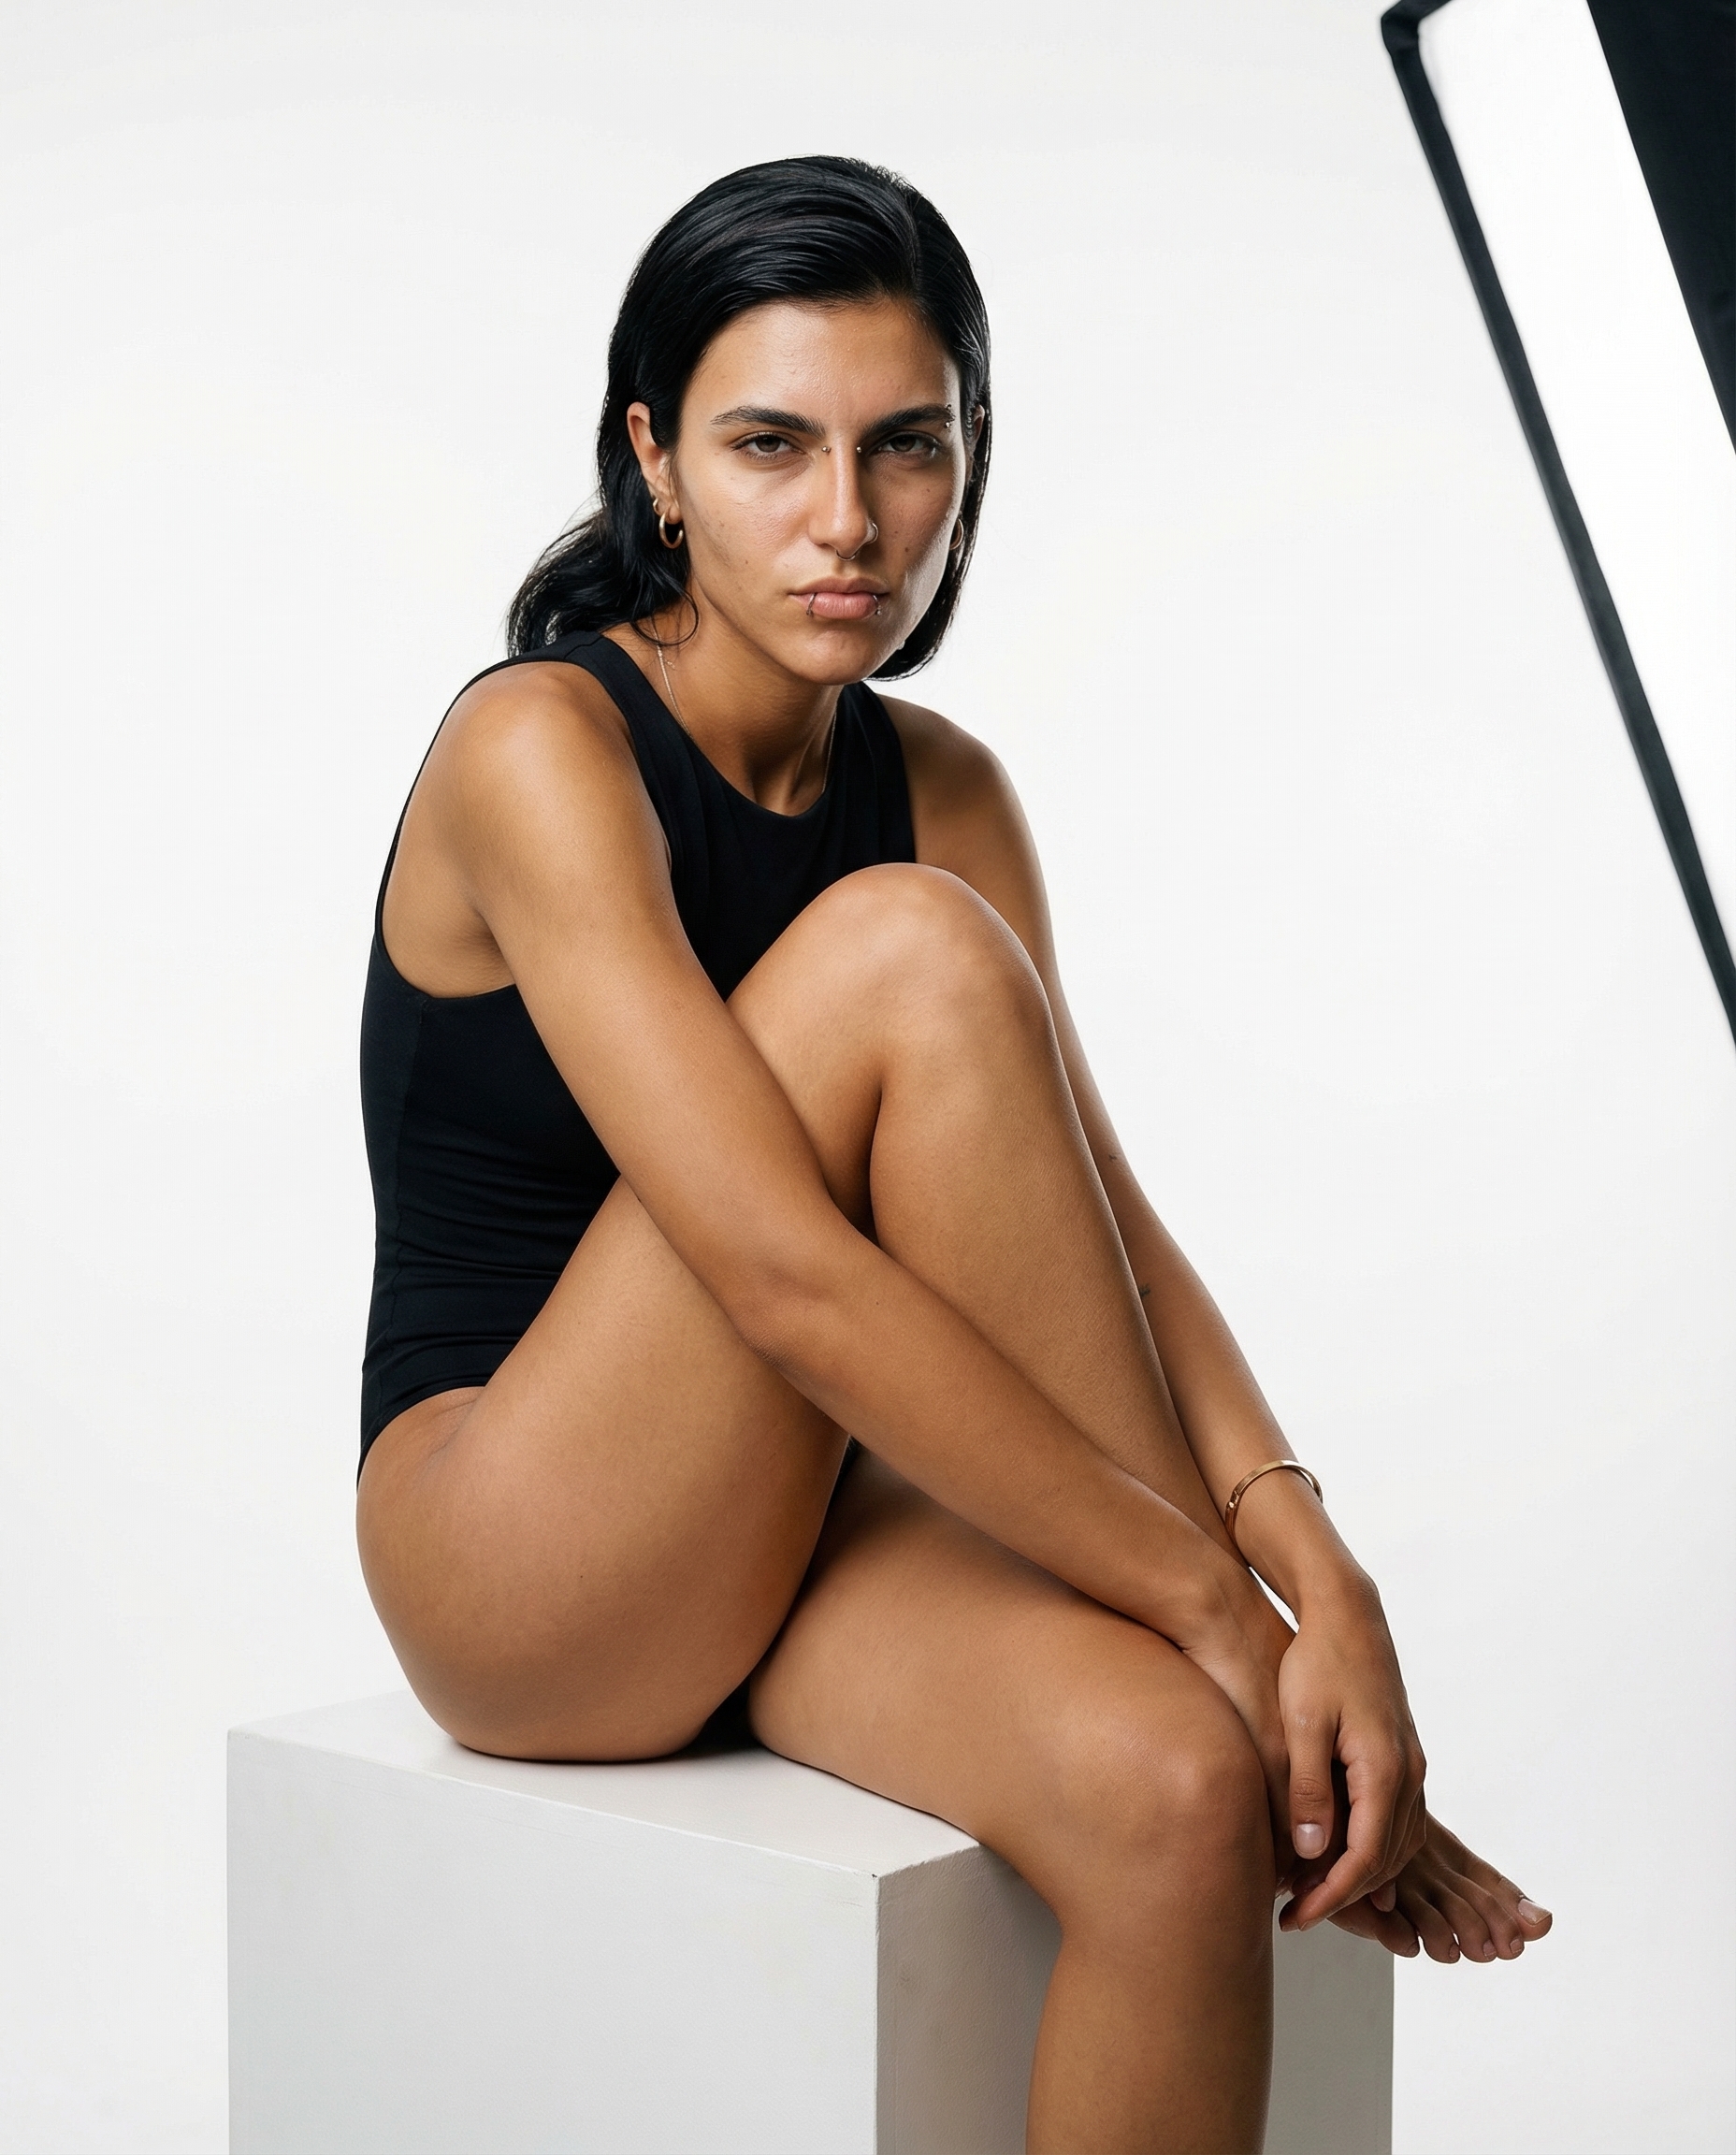
Scene prompt additions: Seated on a white cube in a professional photo studio, wearing a black bodysuit. Clean white background with visible studio softbox/reflector edge. Confident, direct gaze at camera. Professional fashion photography lighting — key light from right, fill from left. Medium shot, 85mm lens equivalent.
This is the most "controlled" scene — studio lighting with a clean background. It serves as a great reference image to verify that all other scenes maintain the same facial structure. Compare her jawline, brow shape, and piercings across every image.
Scene 3: Night Drive
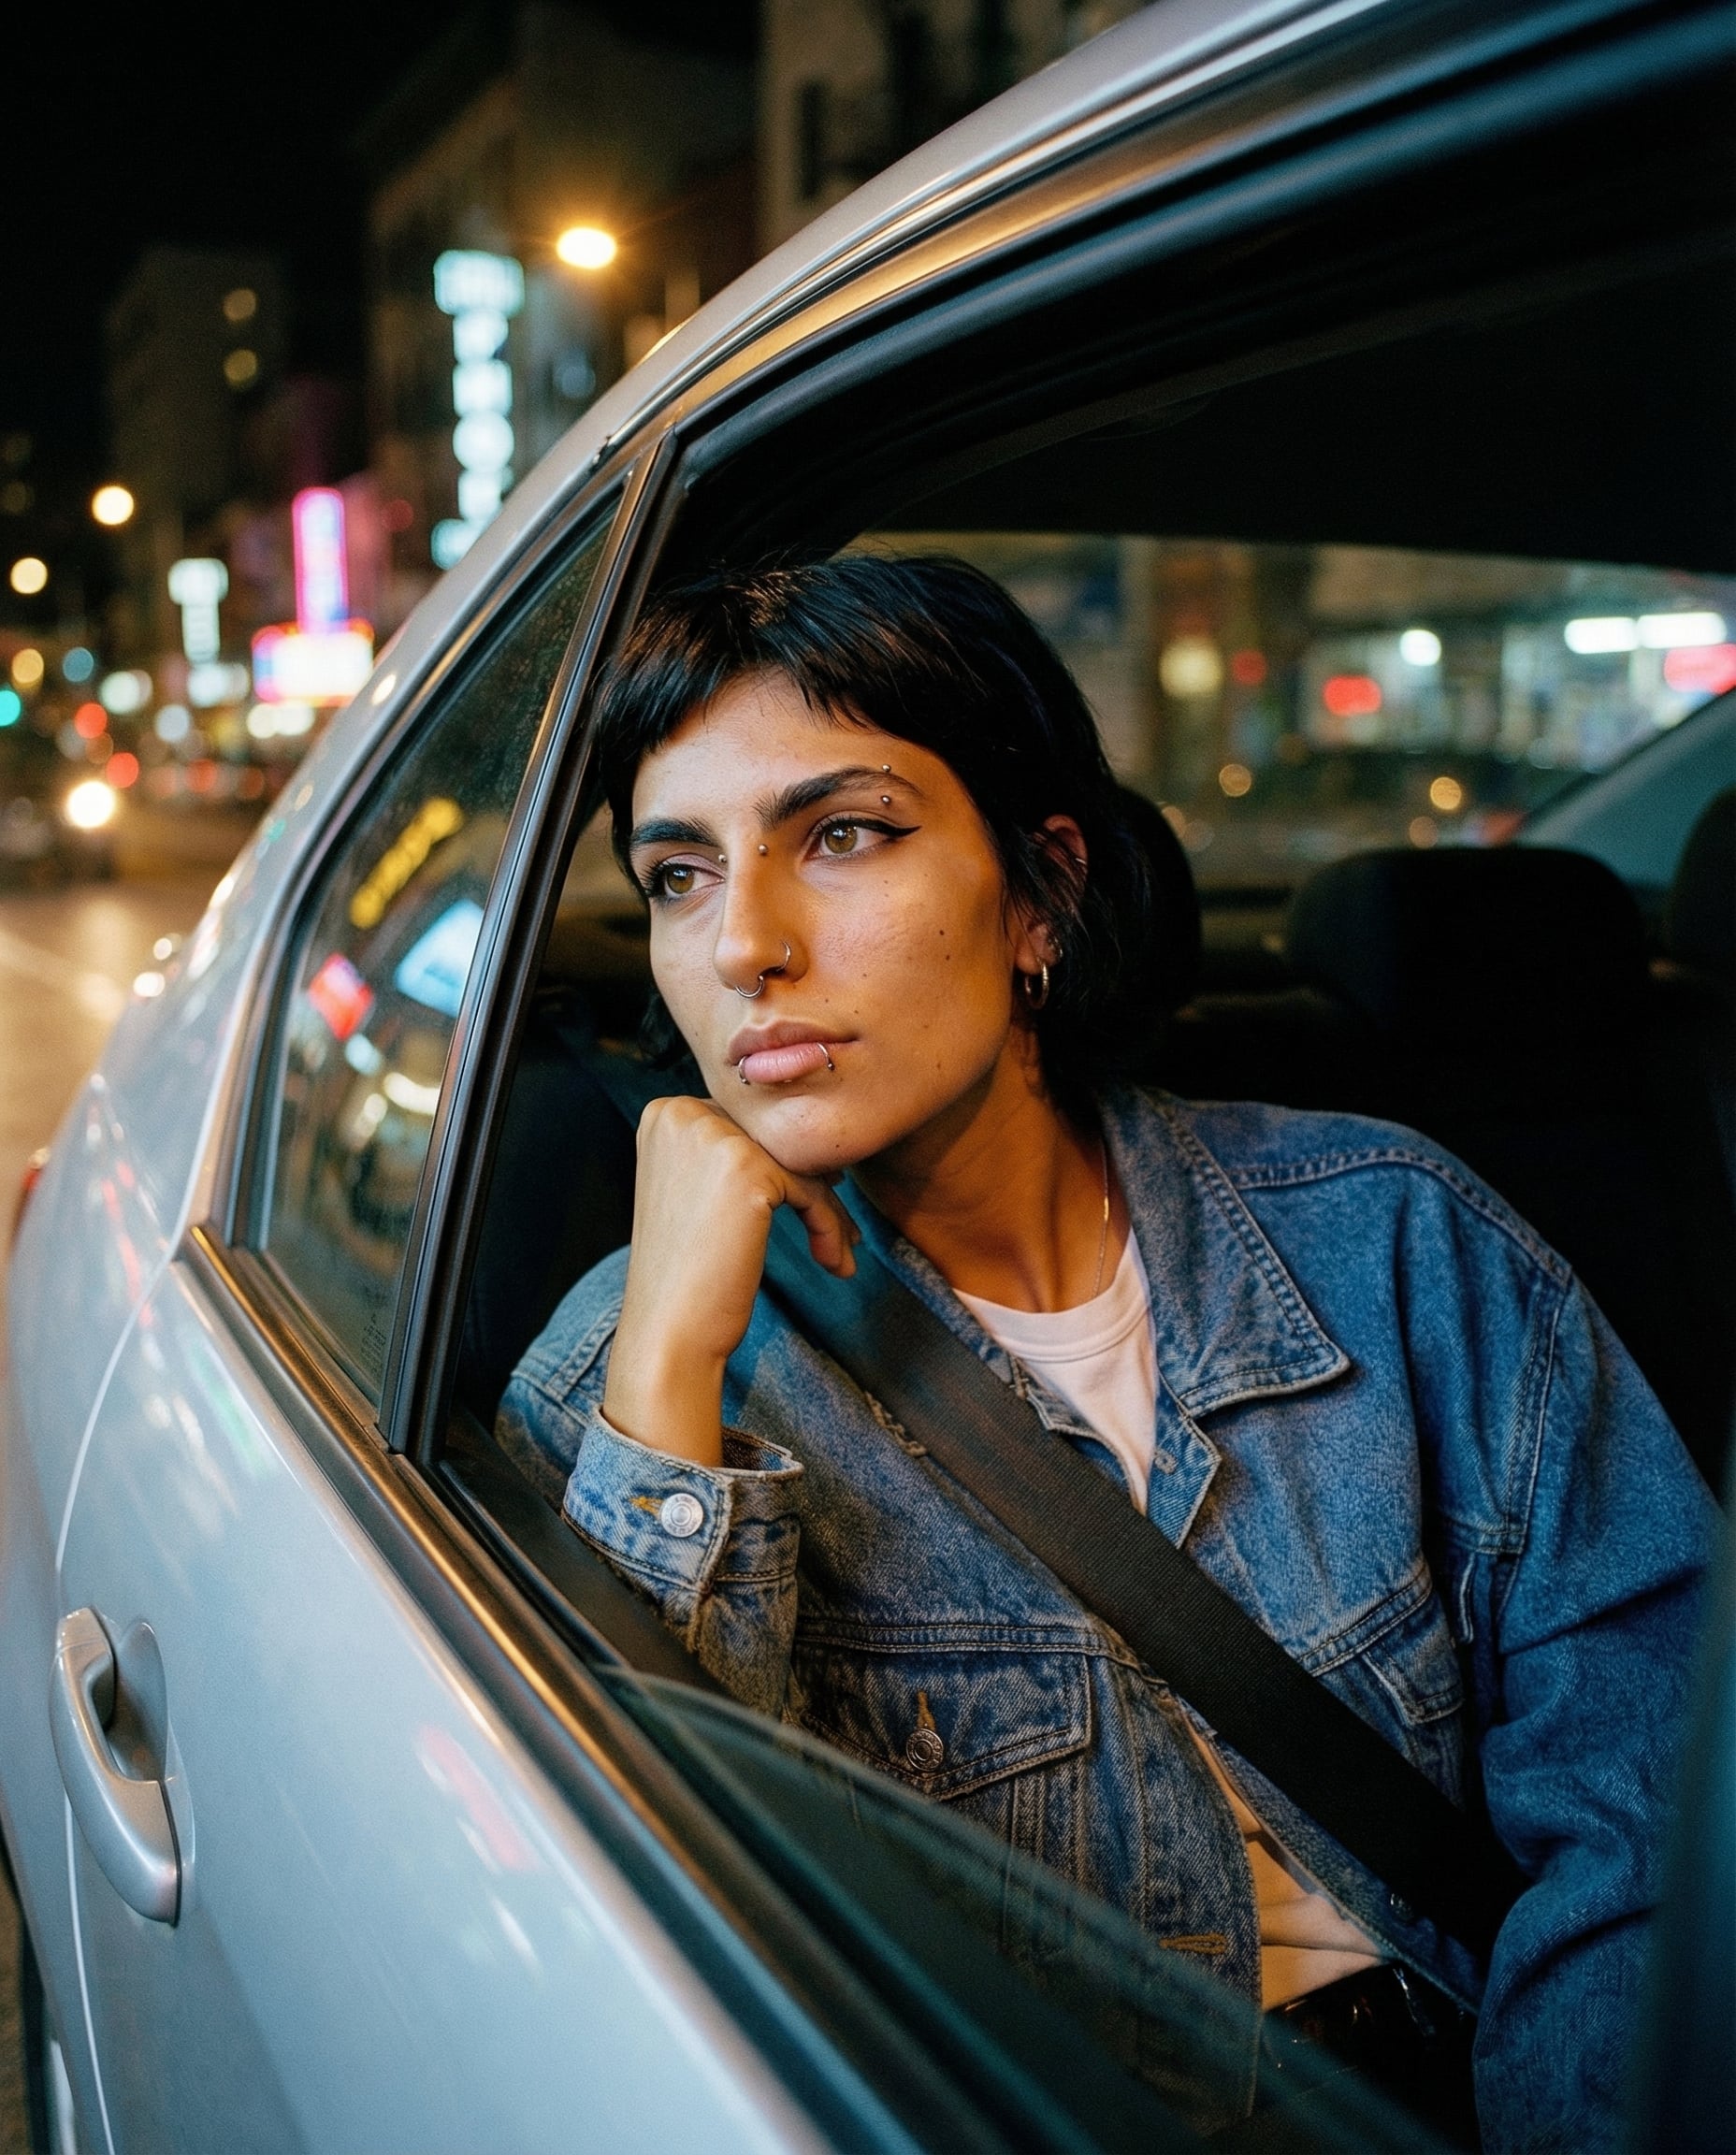
Scene prompt additions: Looking out of a car window at night in a city. Wearing a denim jacket over a light t-shirt. Urban lights and neon reflections in the background (bokeh). One hand resting under chin. Cinematic color grading — cool blues with warm highlights from streetlights. 35mm lens, shallow depth of field (f/1.8).
This scene tests the model's ability to maintain character identity under dramatically different lighting — cool blue ambient light with warm orange highlights from the street. Her features remain consistent despite the challenging mixed-color temperature.
Scene 4: Café Window
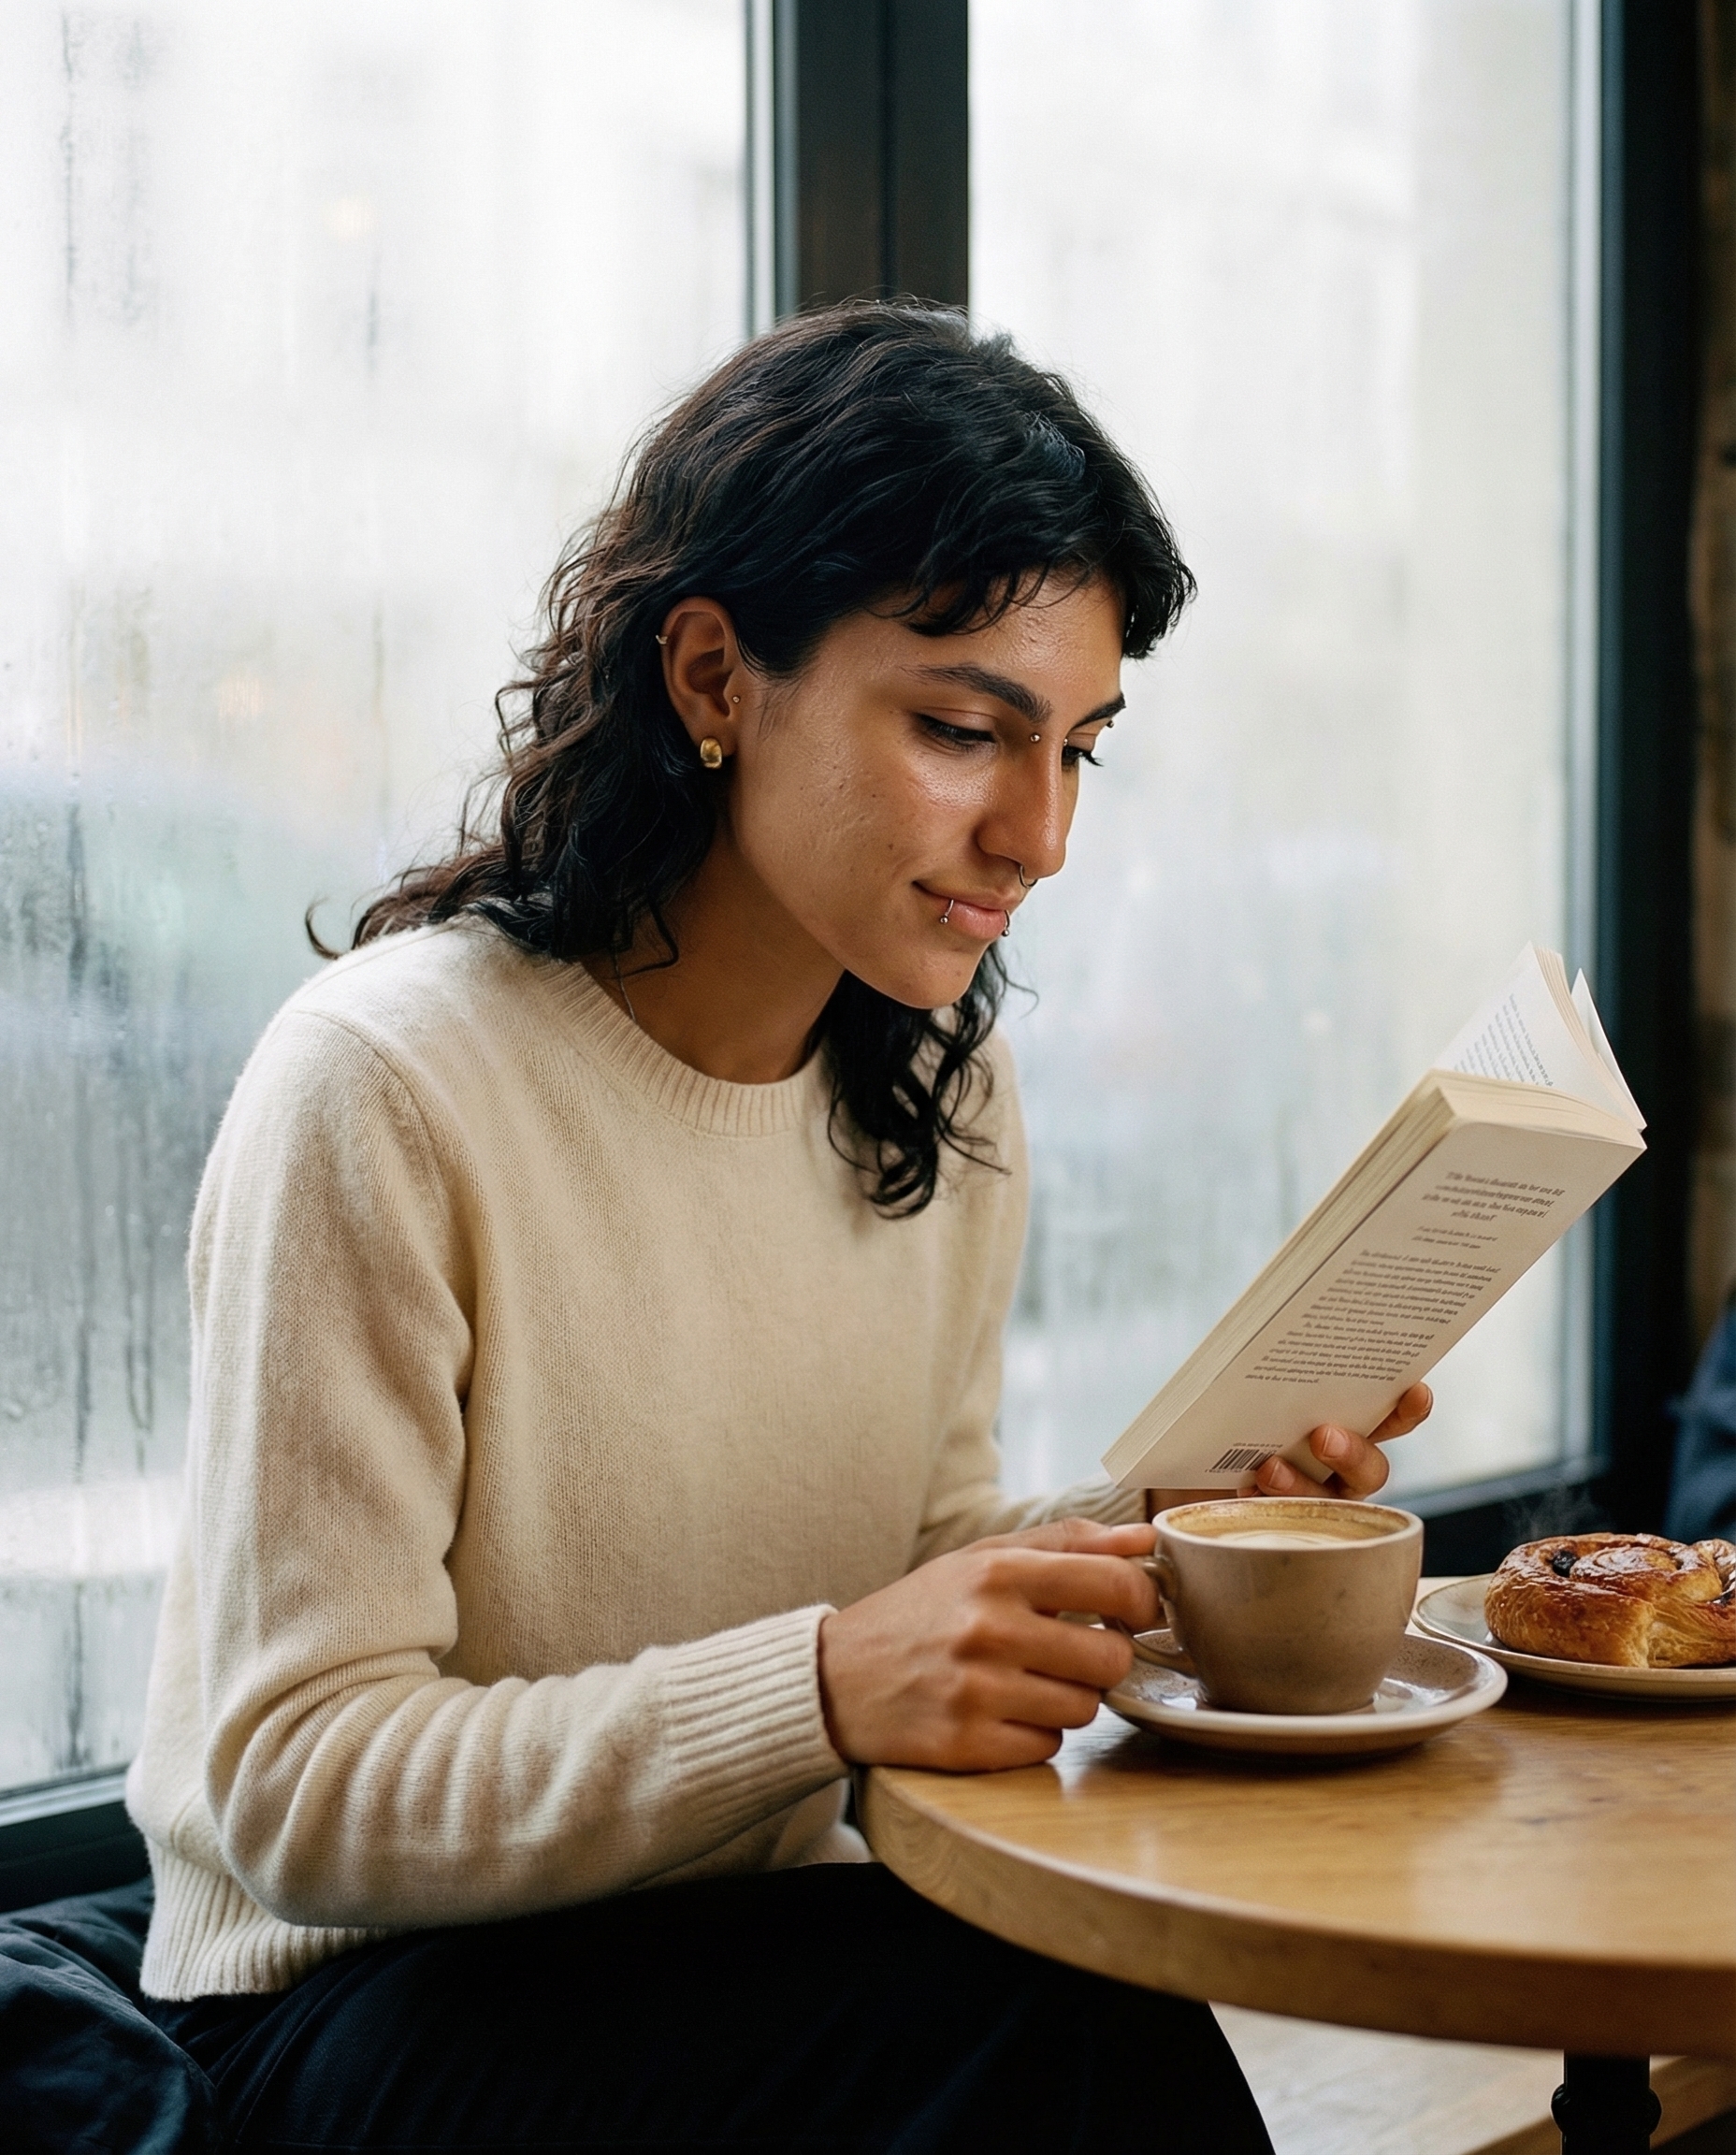
Scene prompt additions: Sitting at a small wooden café table by a rain-streaked window. Wearing a cream knit sweater. Reading a book, holding a coffee cup. Pastry on a plate beside her. Soft overcast daylight from window. Cozy, contemplative mood. Shot at eye level, 50mm equivalent.
A completely different mood — quiet, contemplative, cozy. The model adapts her styling (cream sweater, hair slightly more relaxed) while keeping her core features: the nose ring glints in the soft window light, the gold earrings peek through her curls.
Scene 5: Beauty Routine
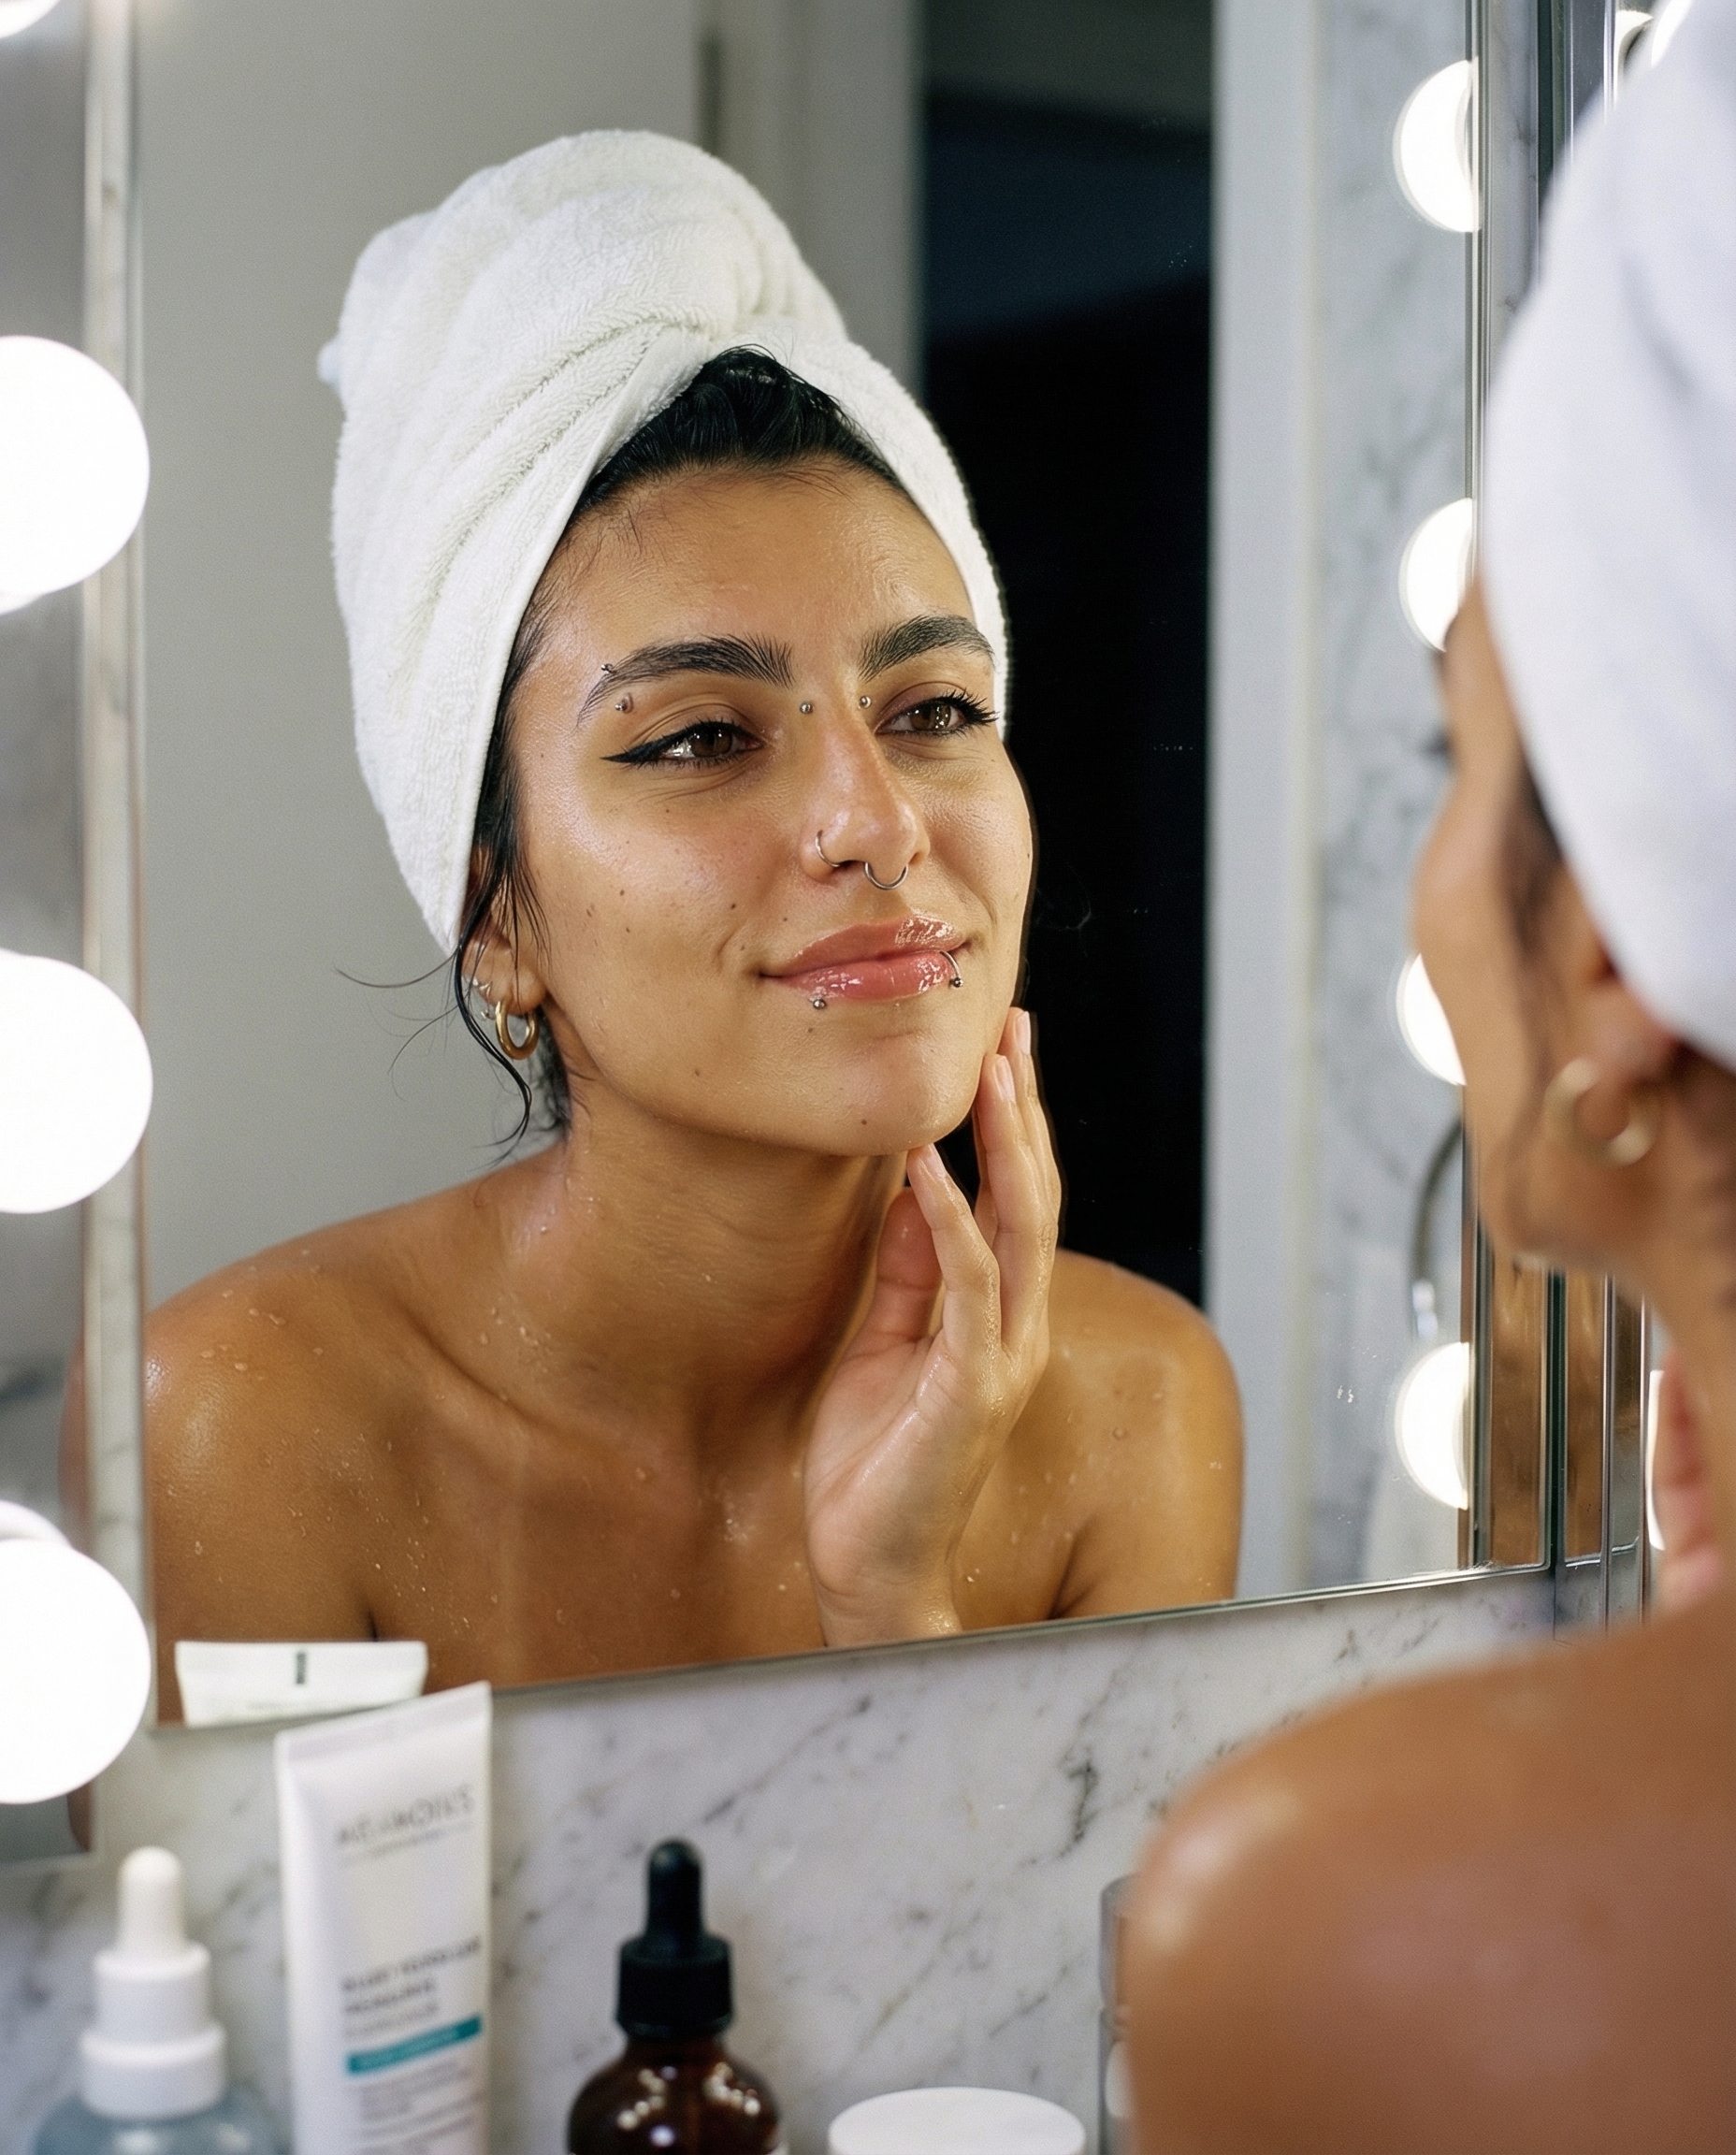
Scene prompt additions: In a marble bathroom, looking at herself in a Hollywood vanity mirror with round bulb lights. Hair wrapped in a white towel. Applying skincare, touching her face gently. Skincare products on the counter. Warm vanity lighting. Close-up portrait from behind her shoulder, showing her reflection.
This is one of the hardest scenes for AI consistency — a mirror reflection. The model needs to render her face twice (the back of her head + the reflection) while maintaining identity. Nano Banana Pro handles it remarkably well — her piercings, eyebrow shape, and skin texture are all accurate in the mirror.
Scene 6: Night Out
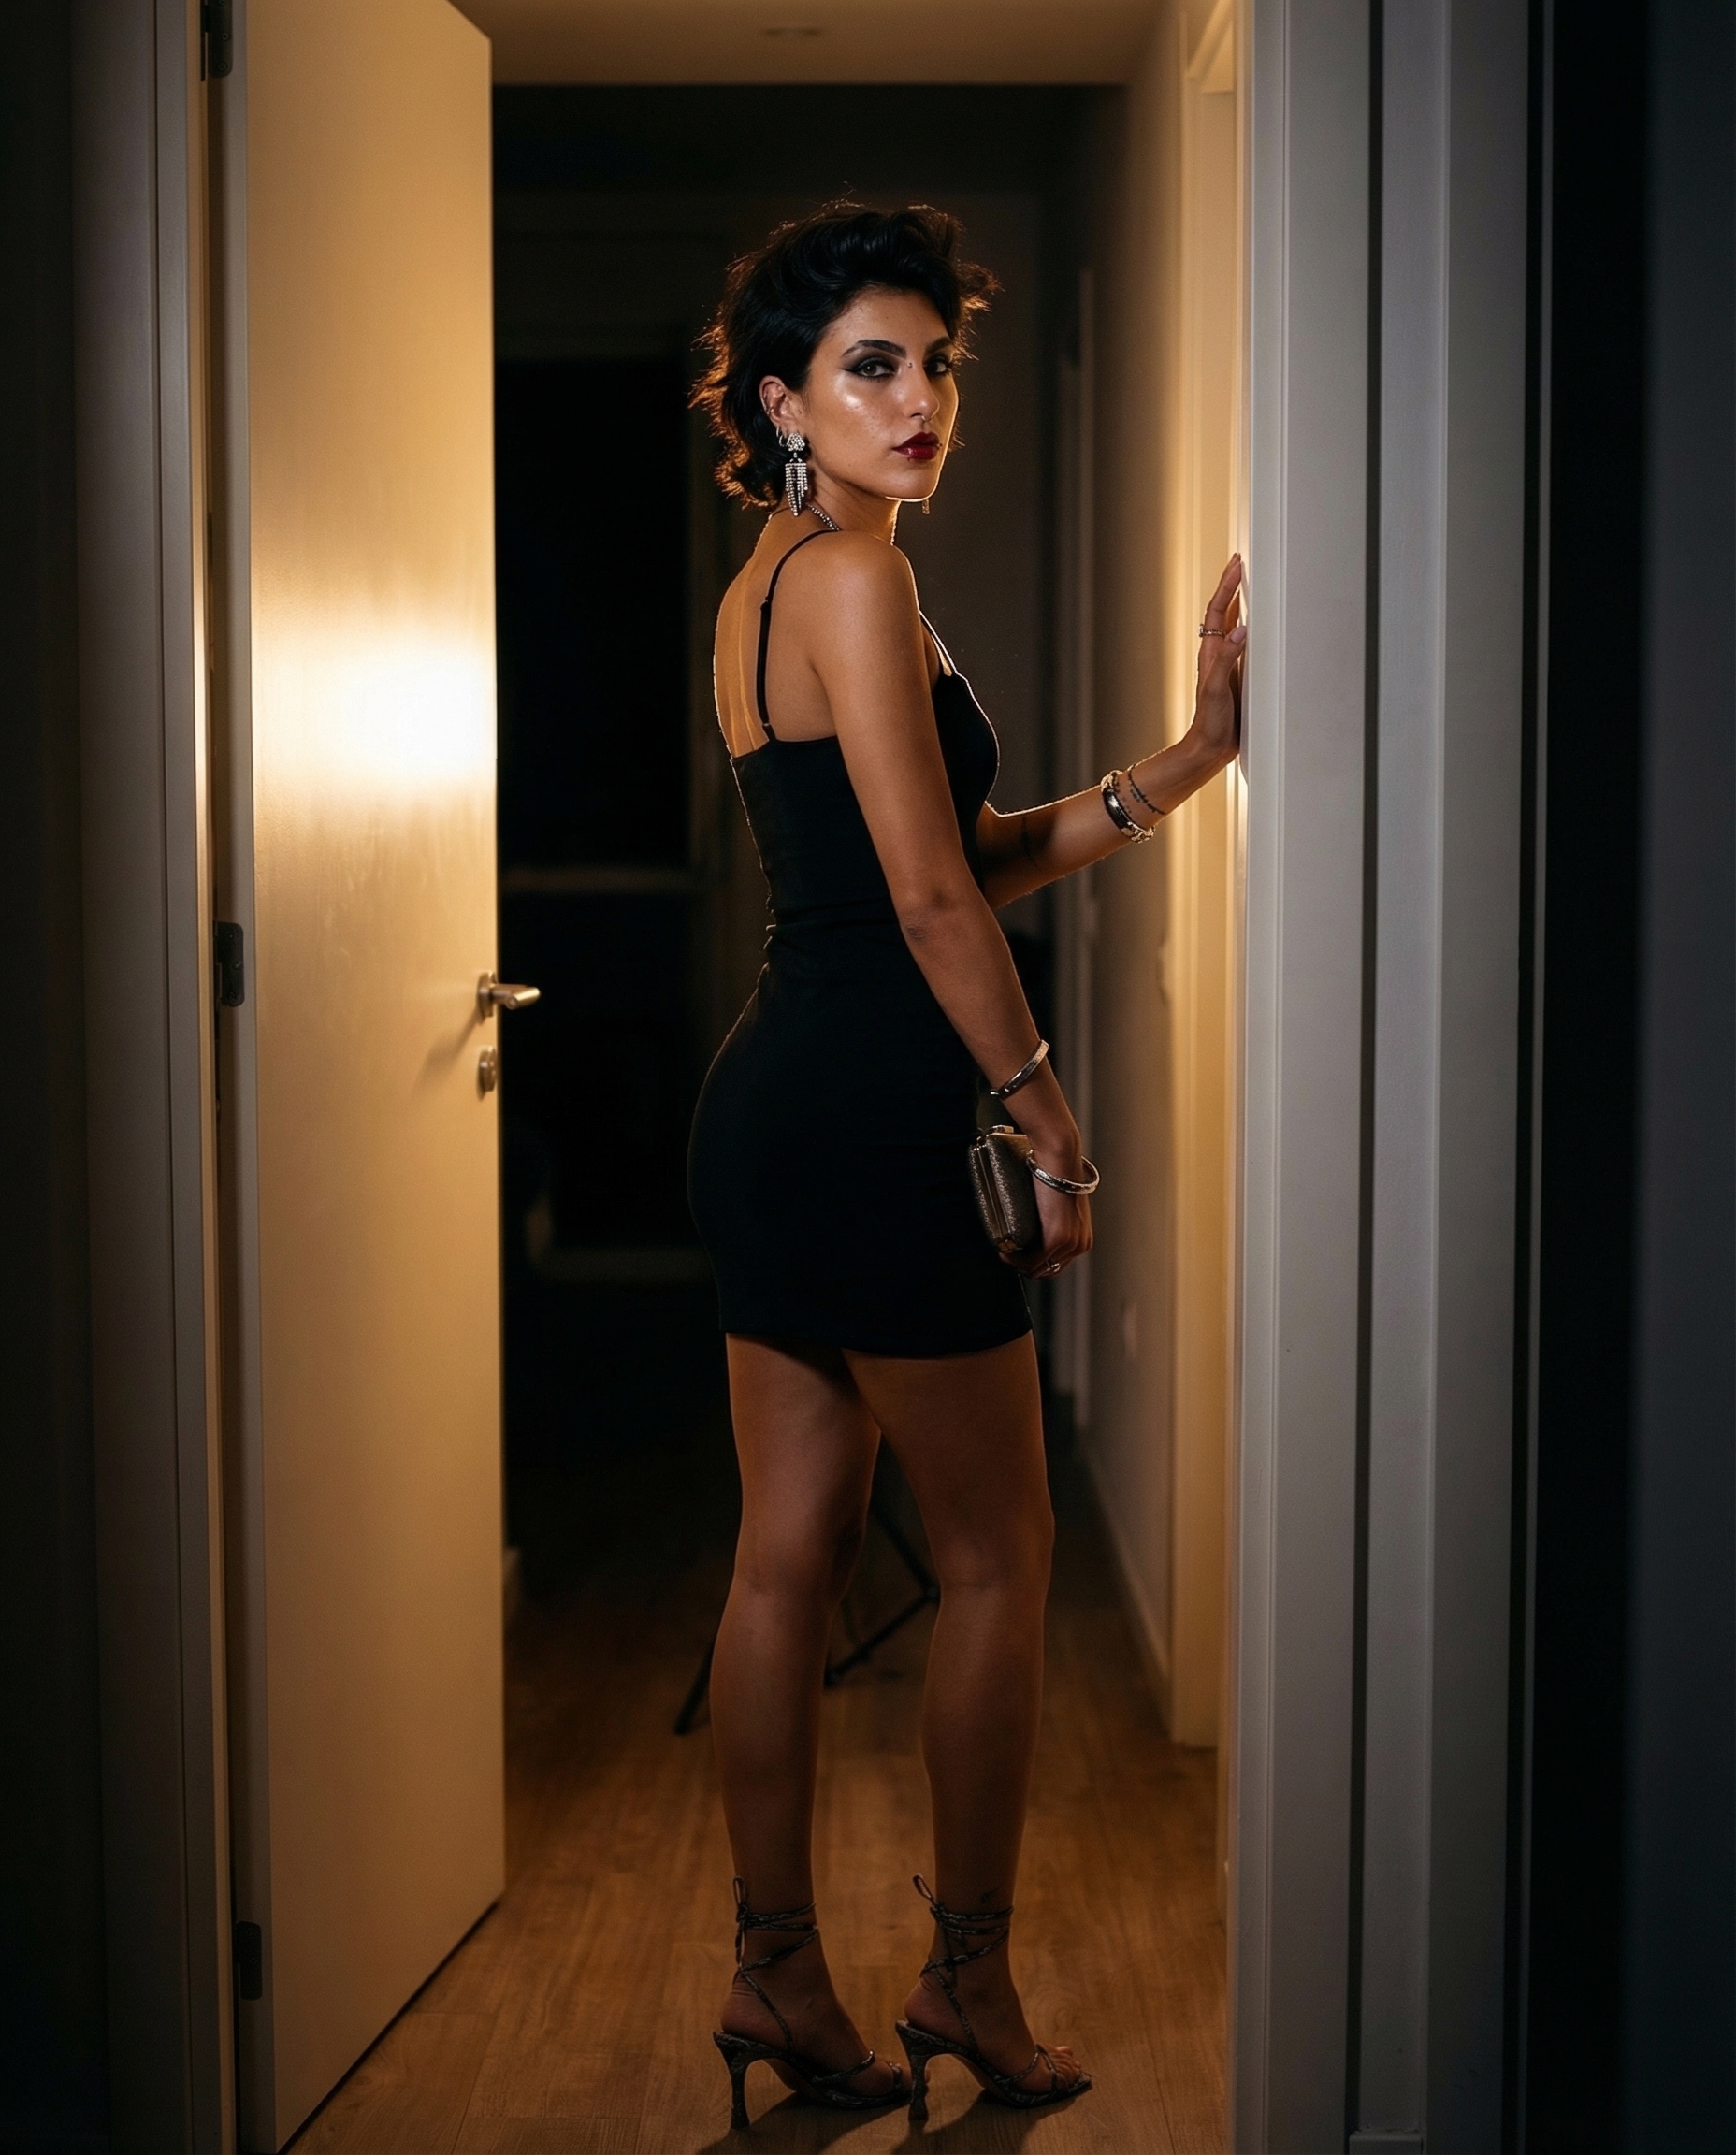
Scene prompt additions: Standing in a narrow apartment hallway, dressed for a night out. Black mini dress, strappy heels, statement earrings, dark lipstick and smoky eye makeup. Warm tungsten lighting from behind creating a silhouette rim light. Full body shot, looking back over her shoulder. Moody, editorial fashion photography.
The biggest styling departure — heavy makeup, different earrings, dramatic outfit. Yet her facial structure, nose ring, and overall proportions remain recognizable. This proves that the anchor description is strong enough to survive even significant wardrobe and styling changes.
Scene 7: Gym Session
Scene prompt additions: In a bright, modern gym. Wearing a black sports bra and high-waisted leggings. Hair pulled up in a messy bun. Holding a dumbbell mid-curl. Light sweat on skin. Wireless earbuds in. Focused, intense expression. Bright natural light from large windows. Upper body shot, 35mm lens.
The athletic scene strips away all fashion elements, testing whether the character is recognizable from face alone. Her strong brows, septum ring, and angular jaw confirm her identity instantly — even with hair up and minimal accessories.
Tips for Maximum Character Consistency
1. Build a Detailed Anchor Description
Don't just say "a woman with dark hair." Specify:
- Exact skin tone and texture
- Hair color, length, texture, and typical styling
- Unique identifiers (piercings, tattoos, scars, moles)
- Facial structure (jaw shape, cheekbone height, eye shape)
- Default accessories that appear in most scenes
2. Keep Physical Identifiers Constant
Choose 2–3 signature features that appear in every scene:
- A distinctive piercing or jewelry piece
- A specific hair texture or color
- A notable facial feature (strong brows, dimples, freckles)
These act as visual anchors for the viewer (and the model).
3. Vary Everything Else
Change the setting, lighting, wardrobe, pose, camera angle, and mood — but keep the physical identity locked. The more you vary the context while keeping the character fixed, the more convincing the consistency.
4. Use Photography-Specific Language
Nano Banana Pro responds exceptionally well to real photography terms:
- Lens focal length (35mm, 50mm, 85mm)
- Aperture (f/1.8, f/2.8)
- Lighting setups (key light, fill light, rim light)
- Color temperature (warm tungsten, cool overcast)
5. Reference the Same "Person" Across Prompts
Always start with the same anchor block, then append scene-specific details. Think of it as:
[ANCHOR DESCRIPTION] + [SCENE] + [WARDROBE] + [LIGHTING] + [CAMERA]
Try It on Musebox
Want to create your own consistent AI character series? Musebox makes it easy to experiment with different models and prompts — including Nano Banana Pro and other cutting-edge generators. Upload a reference, describe your character, and generate entire photo series with consistent identity.
Start generating on Musebox — no complicated setup required.
Follow us for more AI generation tips and tutorials: